Kokedama: The Japanese Art of Plants in a Moss Ball
Learn the Japanese art of kokedama: origin, suitable plants, substrate recipe, step-by-step tutorial and watering by immersion.
By SPRAIA editorial team · Method: botanical sources, field feedback and editorial validation
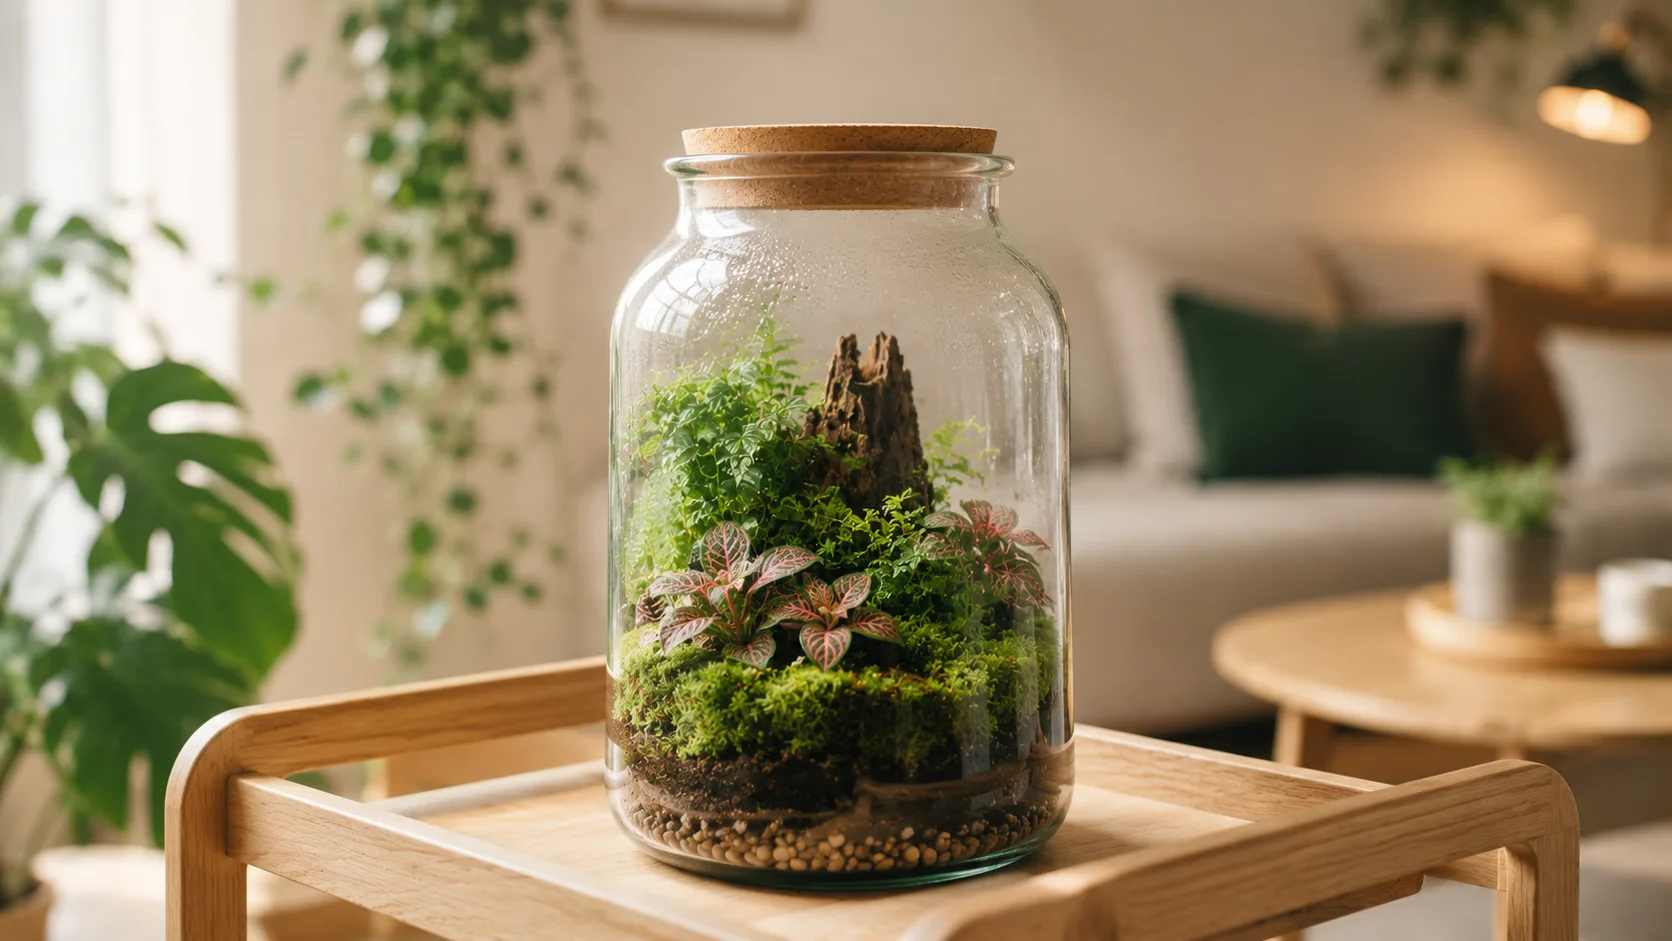
Picture a plant growing without a pot, its roots wrapped in a living moss ball, suspended in mid-air or sitting on a slab of dark slate. That’s kokedama, one of the most poetic plant objects to come out of Japan. Sitting at the crossroads of bonsai, ikebana and wabi-sabi, it turns any houseplant into a living sculpture.
Good news: despite its refined look, kokedama is accessible to any beginner who can follow a recipe and learn to water by feel. In this guide, you’ll discover its history, choose the right plant, build your own ball in under an hour, and care for it so it lives two to three years without repotting.
Japanese origins: from “poor man’s bonsai” to the moss pearl
The word kokedama (苔玉) literally means “moss ball” (koke = moss, dama = ball). It draws on two much older Japanese traditions.
A descendant of nearai bonsai
In the 17th century, some bonsai masters practised nearai, a technique of removing a tree from its pot to display the compact root ball wrapped in moss for the duration of a ceremony. Modern kokedama is its direct heir: the root ball becomes the pot.
In the early 20th century, Japanese amateurs who couldn’t afford fine ceramic pots replaced the container with a simple clay ball covered in moss. Hence the nickname “poor man’s bonsai” (binbô bonsai). As Japanese minimalist interiors rose in popularity in the 1990s, kokedama spread worldwide.
The wabi-sabi philosophy
Kokedama embodies wabi-sabi, that Japanese aesthetic which celebrates imperfection, impermanence and simplicity. A ball is never perfectly round. The moss yellows and greens again depending on humidity. The plant evolves, leans, dialogues with its surroundings. Far from the strict control of a manicured bonsai, the kokedama simply lives.
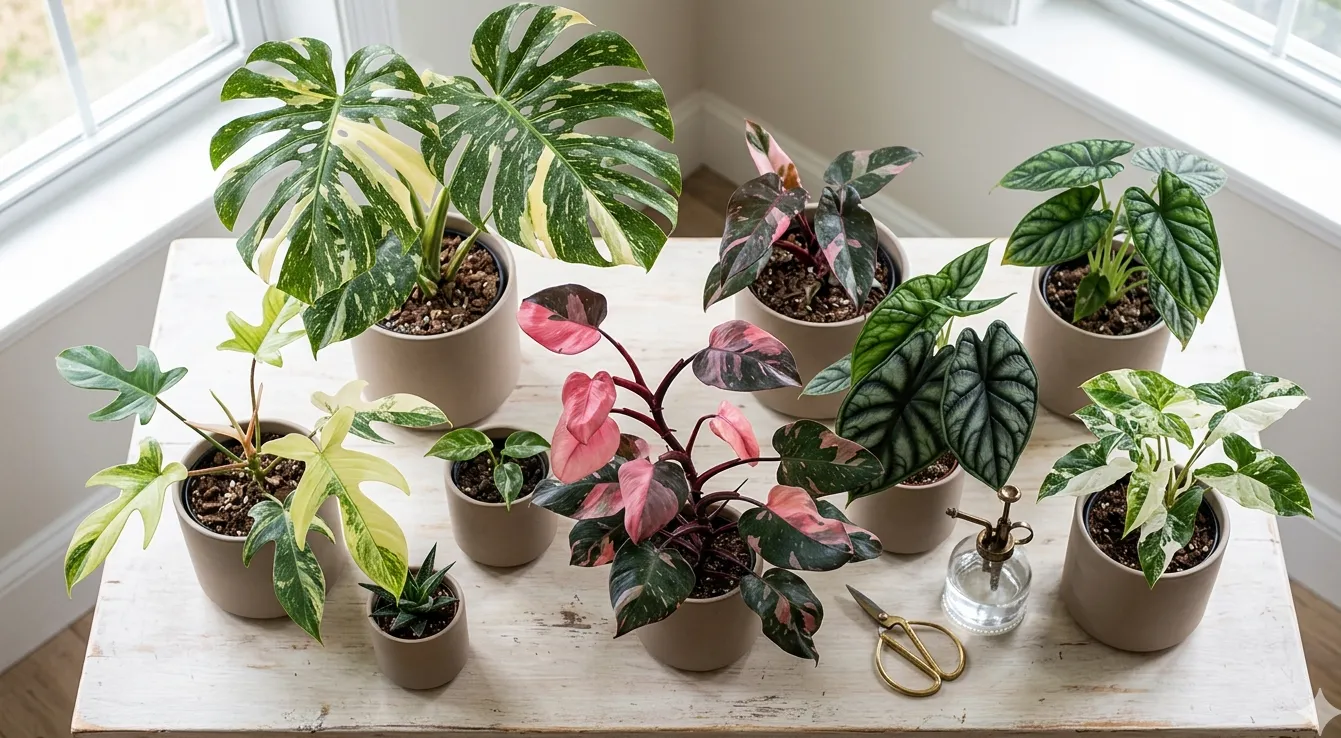
Choosing a plant suited to a kokedama
Not every plant tolerates having its roots wrapped in a damp ball. Here are the ones that genuinely thrive.
Easy plants for a first kokedama
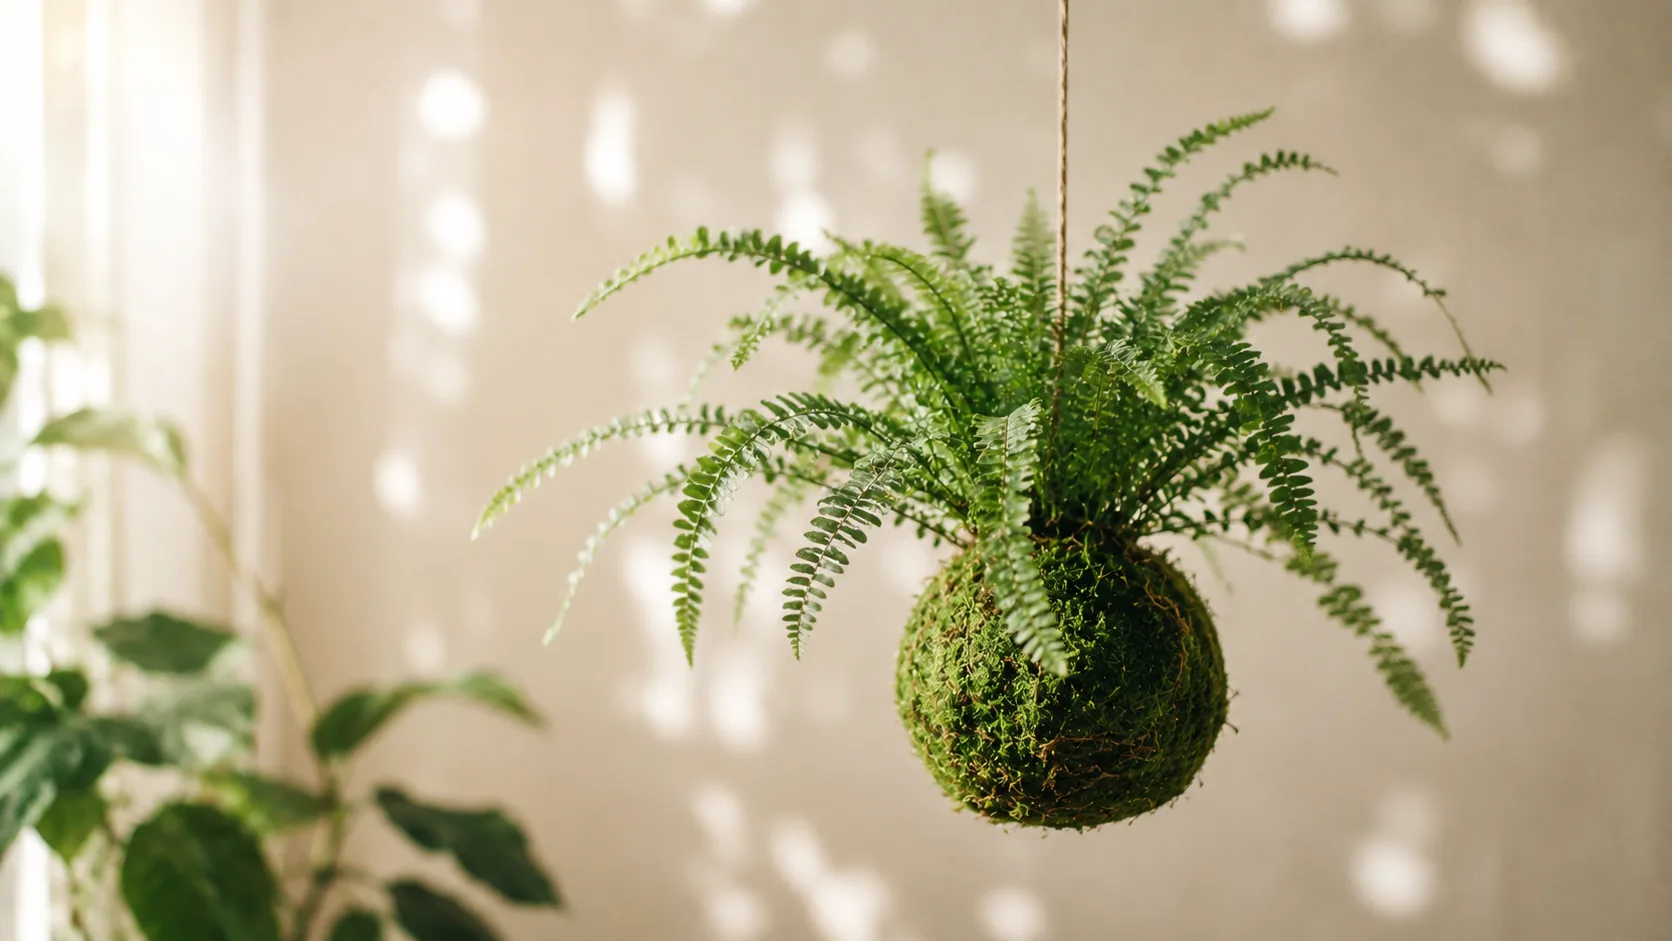
- Ferns (Nephrolepis, Asplenium, Davallia) — the absolute champions, they love the ball’s constant humidity
- Pothos — nearly indestructible, forgives missed waterings and shifts in conditions
- Philodendron scandens or hederaceum — flexible, draping, perfect when hung
- English ivy (Hedera helix) — graceful trailing foliage
- Asparagus plumosus or densiflorus — airy texture, very “Japanese-feeling”
- Peace lily — appreciates high humidity, dramatically signals thirst by drooping
Plants for advanced kokedama
- Anthurium — gorgeous but demands high ambient humidity
- Calathea and Maranta — splendid but sensitive to hard tap water
- Mini ficus (pumila, retusa) — for a miniature bonsai effect
What to avoid
Succulents and cacti hate having their roots in constant moisture — your ball will rot within weeks. Plants with thick tuberous roots (Alocasia, Zamioculcas) also cope badly with being squeezed into a tight ball.
The substrate recipe: akadama and peat
The secret to a successful kokedama lies in the substrate inside the ball. Too dry and it crumbles. Too dense and the roots suffocate. The traditional Japanese recipe balances both.
The classic recipe (the simplest)
- 70% akadama (granular Japanese clay) or, failing that, sieved clay-rich potting soil
- 30% peat moss or moistened coco coir
- A handful of vermiculite for water retention (optional but recommended)
Akadama is ideal — a porous clay that holds water without becoming waterlogged. You’ll find it at specialised bonsai stores. Sieved garden clay works as a substitute.
The “beginner kit” recipe (no akadama)
If you can’t get akadama:
- 50% sieved general-purpose potting soil (no bark chunks)
- 30% coco coir, soaked and squeezed
- 20% bentonite or powdered clay (sold at pharmacies or garden centres)
The goal is a mouldable paste, firm but not crumbly, that will hold its shape around the roots.
Step-by-step tutorial: making your kokedama
Allow 45 minutes for your first kokedama. Work on a large board or a tarp: it will get messy.
What you need
- Your plant (in a pot, healthy roots)
- Sheet moss (Hypnum cupressiforme or foraged forest moss) — roughly 30 × 30 cm
- Substrate prepared as above
- Natural cotton string (or fine jute twine) — 3-4 metres
- Scissors, a bowl of lukewarm water
- A container to mix the substrate
Step 1 — Prepare the root ball
Unpot your plant. Gently massage the root ball to dislodge about 30% of the original substrate. The aim: expose the roots without breaking them, and reduce the total volume by roughly a third. Think of it as a mini-repotting.
Step 2 — Mould the substrate ball
Mix the substrate with a little water until it has the consistency of firm modelling clay. Form a ball slightly larger than your fist around the roots, coating them completely. Pack firmly without crushing. The ball should hold its shape on its own.
Step 3 — Cover with moss
Soak the sheet moss in lukewarm water for 1 minute, then squeeze gently. Apply it green side outward all over the ball, overlapping pieces. Cover everything except a small crown around the plant’s collar.
Step 4 — Wrap with string
Hold the moss in place by wrapping cotton string around the ball in every direction: vertically, horizontally, diagonally. Plan for 15 to 20 passes in total. The string should be taut but not cut into the moss. Tie a discreet knot underneath. If you plan to hang it, add two opposing loops with sturdier thread.
Step 5 — First soak
Submerge the kokedama entirely in a bowl of room-temperature water for 10 minutes. Bubbles will rise: that’s air leaving the substrate, a sign that water is penetrating properly. Lift, let drain for 15 minutes. Your kokedama is ready to live.
Daily watering and care
Watering is the key to a kokedama’s longevity. It’s also the main reason beginners fail.
The immersion method
The only effective way to water a kokedama is to submerge it entirely in a container of water:
- Frequency: when the ball feels noticeably lighter and the moss is dry to the touch
- Duration: 10 to 15 minutes, never more than 20 for rot-prone plants
- Water: room temperature, ideally non-calcareous (rainwater, filtered water)
- After: let drain for 20-30 minutes over a sink or tray
In a warm apartment in summer, count on 2 to 3 immersions a week. In winter, one a week is often enough. To fine-tune your rhythm, see our general principles for watering houseplants.
The weight test
The foolproof method: heft the ball in your hand. Right after immersion it feels heavy. When it feels clearly light, it’s time to re-soak. You’ll develop intuition fast.
Misting and light
Mist the moss 2 to 3 times a week so it stays green and alive. Place your kokedama in bright indirect light — never full sun (the ball dries out in hours), never a dim corner (the moss yellows and the plant stretches). An east or west window is ideal, or two metres from a south window behind a sheer curtain.
Fertiliser
Every 2 to 3 months from April to September, add a few drops of diluted liquid fertiliser (half the recommended dose) to the immersion water. No more: the ball holds little substrate, so over-fertilising is a real risk.
Lifespan and renewal
A well-tended kokedama lives on average 2 to 3 years. Beyond that, the roots have filled the ball, the substrate is spent, and growth slows visibly. Several signs announce renewal time:
- The ball no longer holds water: it comes out dry after 15 minutes’ soak
- The moss yellows despite regular misting
- Roots emerge in abundance through the moss
- Leaves become small and pale, signs of substrate depletion
At that point, two options: rebuild a larger kokedama (15-20% more volume), or repot the plant conventionally. The principle is identical to a classic repotting: free the roots, refresh the substrate, restart growth.
Common mistakes and how to avoid them
- Completely dry moss: you wait too long between immersions. The ball should feel light but not crumbly. Increase frequency in summer
- Plant constantly yellowing or drooping: over-immersion, roots are rotting. Space out watering, ensure you let the ball drain for 30 min
- Ball falling apart: substrate too sandy or low in clay. Add bentonite or akadama to the recipe
- Moss that never revives: dead foraged moss, or interior too dry. Use fresh moss from a specialist nursery, mist daily for the first two weeks
- Wrong plant: if your succulent collapses, that’s expected — retry with a pothos or fern
To go deeper on indoor lighting, read our complete light guide, and for a companion plant to pair with your kokedama, browse our suggestions on philodendrons.
Display and styling
Kokedama really comes into its own with thoughtful presentation:
- Hanging at varied heights in clusters (an aerial jungle effect)
- Sitting on slate, a raw ceramic dish or a dark wood disc
- Lined up on an open shelf against a pale background to bring out the green
- Centre of the table on a Japanese tray (an inverted suribachi) surrounded by a few stones
Avoid fragile surfaces: the ball may sweat after immersion. Always set it on a saucer or matching dish.
Frequently asked questions
The most common questions from those getting started with kokedama.
- On average 2 to 3 years before needing renewal. Beyond that, roots have fully colonised the ball and the substrate is spent — the plant slows down. You can then rebuild a larger ball or repot conventionally.
- Immersion is vastly superior. Water poured on top runs off the moss without reaching the heart of the substrate, which stays dry. Immersion guarantees even hydration. If you're in a rush, mist the moss generously — but a real soak is still essential each week.
- No, it's often reversible. Moss yellows when ambient humidity is low. Mist daily for one to two weeks and it greens back up. If it stays brown despite misting, simply replace it with fresh moss wrapped over the old layer.
- After immersion, always let it drain for 20 to 30 minutes over a sink before putting it back. If it hangs, place a small container under it for a few hours. A raw ceramic dish or slate slab as a base also absorbs residual moisture.
- Yes — it's the easiest method. Pick a young plant in a 12 cm pot or smaller. Unpot, gently reduce the root volume by 30%, then follow the tutorial. Avoid plants just delivered from transport — let them acclimate for a week before transforming them.